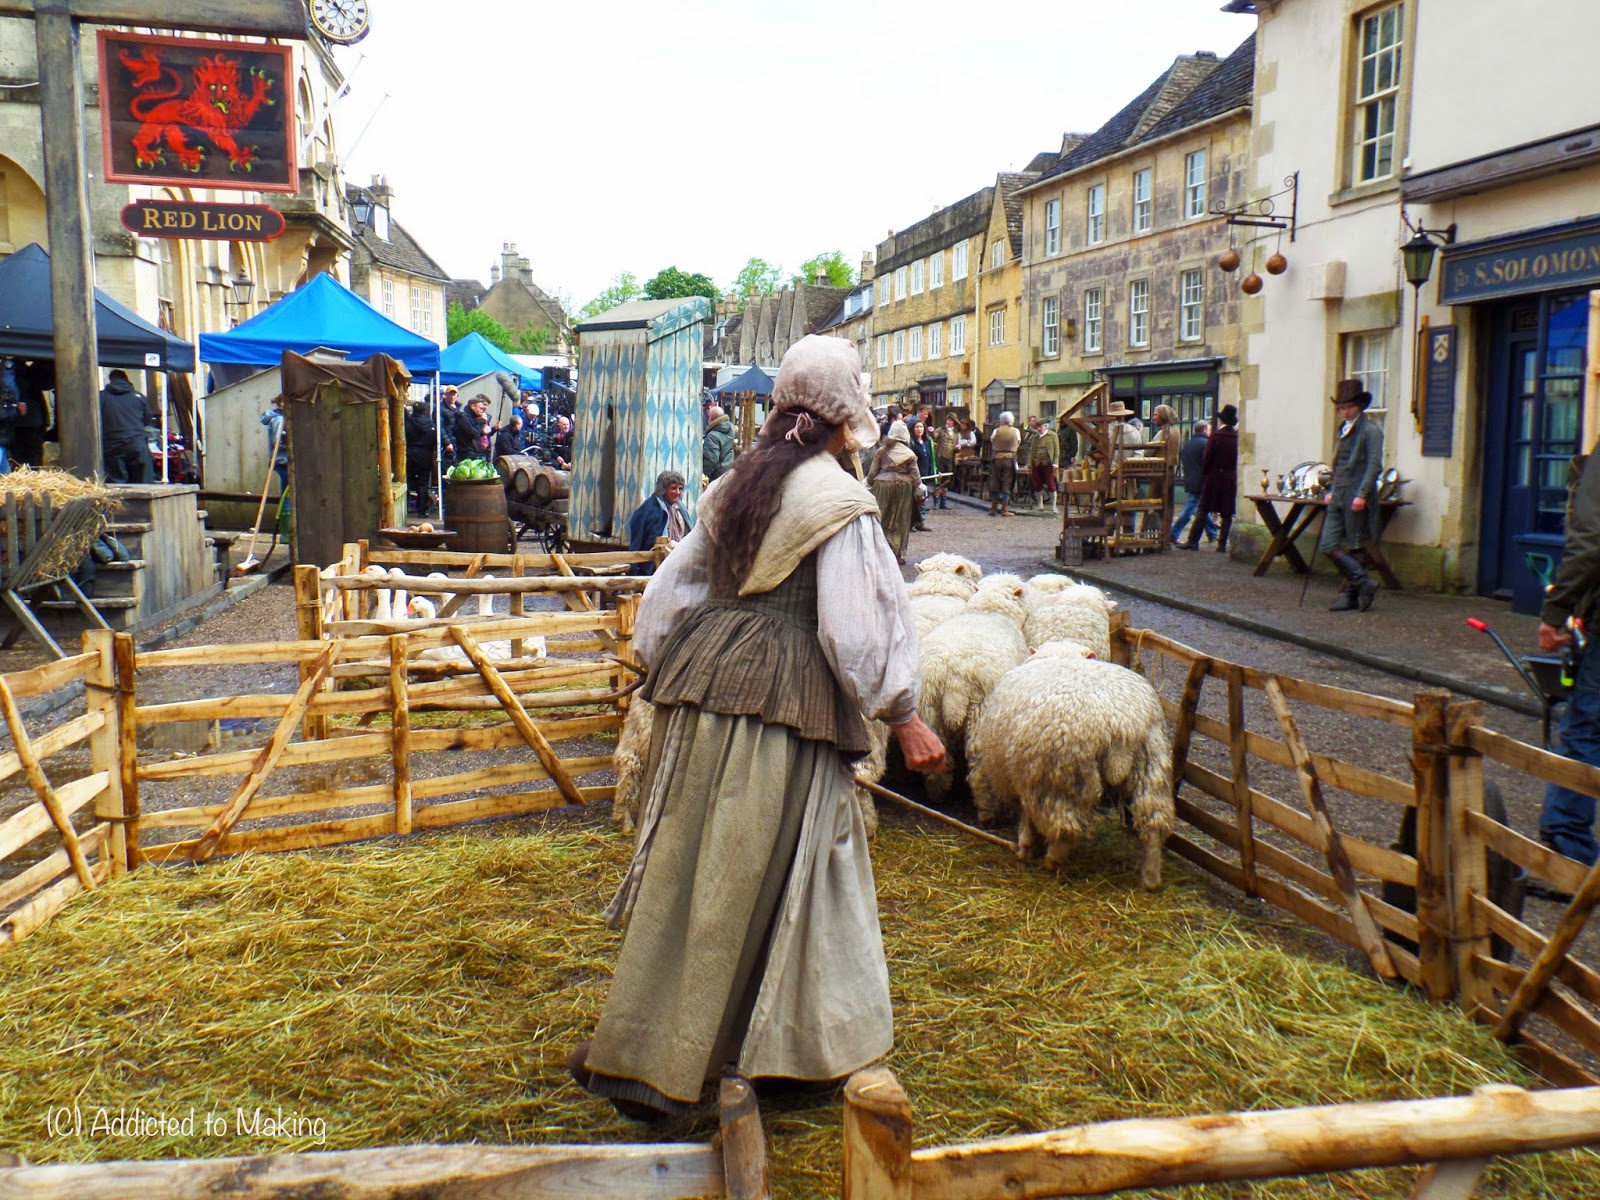
Last week there was much excitement in one of the little towns around here with the arrival of a film crew for the re-make of the popular 1970's Poldark series (based on Winston Graham's novels).
I do love a good period drama so couldn't resist popping down with my trusty camera to take a few shots!
 |
| Not what I would usually expect to see when I go shopping in Corsham! |
It was brilliant - the whole of one end of the High Street had been given an C18th make over! There were pens of sheep...
...geese...
...with market stalls of all kinds of things...
 |
| Loaves and fruits 'n' veg... |
 |
| Masses of Pasties & Pies (sadly all fake!) |
 |
| Olde candles... |
...and even some of the shop fronts had been replaced with more authentic retailers of the time...
 |
| (is that the Tardis masquerading as a doorway... that might explain things!) |
There were horses & carriages clip-clopping around...
And, in between the rain showers, a truly motley assortment
of market traders, shoppers & a few Gentry!
I believe that the new series of Poldark will air sometime in 2015.. I do hope they come back again to film some more (it was only filmed there for a few days and the street is back to normal now)
 |
| Actors leaving at the end of the day... |
Anyway, I'm told a good dose of sunshine is due this weekend... which makes me think of summer picnics... and with that news and all the costume drama excitement of last week I expect you can guess where all this is leading... yes - a new (slightly whimsical?) Poldark-market-stall-inspired-make in the shape of a keyring made up of miniature pies!
As you might guess, there are several component parts to this project and you will need to gather up three different shades of brown felt, some embroidery thread & needle, scissors, jump rings, toy stuffing, ribbon and large split ring. Ready? Ok, let's start with...
Mini-Pasty..
 |
| Cut a small circle of pale brown felt (I used an egg cup to draw around).... |
 |
| Thread your needle with 3xstrands of embroidery thread.. |
 |
| Fold the felt circle in half and then roll the edge slightly. Sew around the edges as you work to secure. |
 |
| Just before you sew up the end, stuff it with a little toy stuffing! |
 |
| ....then just finish sewing up and trim any ends. |
Mini-Pie 1...
 |
| Cut a small rectangle of dark brown felt into a cross as shown.. |
 |
| Sew up each side... |
 |
| (you should now have a pie 'base' like this...) |
 |
| Cut a second piece of felt that will fit as a 'top' for the pie |
 |
| ...and begin to sew onto the top |
Just before you finish sewing up the top, stuff it with stuffing.
Mini-Pie 2...
 |
| Cut a small circle of brown felt... |
 |
| Run a tacking stitch around the edge but leaving a long end of thread at the beginning and ends... |
 |
| Pull the ends of the thread together to gather up the felt |
 |
| Stuff with a little stuffing |
 |
| Cut another smaller circle of felt to fit in the top of the pie... |
 |
| Pull the ends of the thread and knot so they hold in the felt lid (tip: press down with a pencil) |
 |
| You should now have 3 cute little pies like this! |
... to make the keyring...
 |
| Push a jump ring through one of the pie stitches on each pie (or make a little threading hole in the felt with a bodkin) then close the jump rings. |
 |
| Then simply attach each miniature pie to the split ring with a piece of pretty ribbon. |
Now all that's left to do now is to attach it to your summer Picnic Basket and pop off to enjoy the sunshine!
 |
| yum yum! |
Enjoy :-)
All photos (c) Addicted to Making.


No comments:
Post a Comment