Thursday 14 May 2015

Macrame, DIY belts & 1970s retro styling...

macrame materials

Since the building work on our house was completed I've been tasked with planning the decorating and interior styling.  The house is a typical 1970's build - complete with 'serving hatch' between kitchen and dining room which I have not, under any circumstances, let anyone remove (although a previous builder did somehow manage to chop and inch or so off the bottom of the doors so I've still got to work out how to sort it back out!)
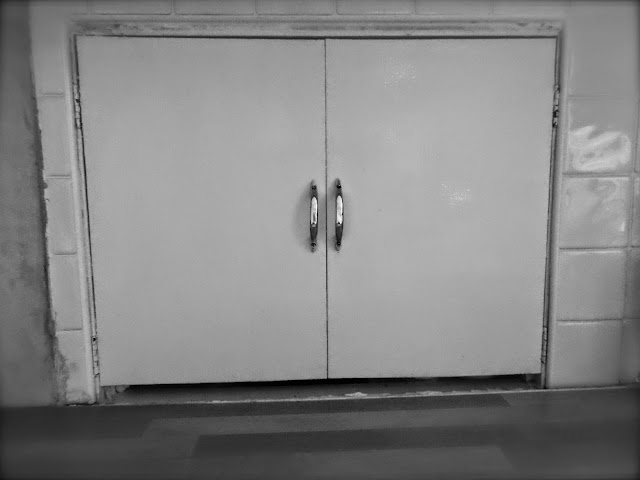

serving hatch circa 1970s
Hands off my hatch!

Being a bit of a collector (aka hoarder according to the family) I am also looking forward to mixing the decor plans with being able to display some of my finds.  I also want to give the occasional nod to it's humble summer of '76 beginnings (without overdoing it) so it's great that all things 70's are back on trend because it means there is lots of inspiration in the shops!  I've already got me some flared jeans and a few crochet tassel tops (ooh I'm so retro ;-)) and what I want now is a belt and well, being a crafter, what a fab excuse to get making a DIY macrame one just like they did back in the day! 

I've used simple macrame techniques to make jewellery in the past - I even did a 'Macrame Bead Bracelet' tutorial for YouTube when 'those' (which-shall-not-be-named..) bracelets were popular.   In fact if you watch it you will see how to make basic 'square knots' (plus a few other good tips for adding beads to knotted cords!)  I've kept the rest of the knotting pretty simple on the belt so once you can do a square knot you should find the rest of it pretty easy too.


macrame string crafts
 (quick explanation for the vintage Black & White photos
 - it's not a mistake... I actually thought they made
 the knotting easier to follow this time!


So, to state the obvious,  you need scissors and some string - lots of it!  I cut 5 x 5mt lengths because I didn't want a really wide belt  I also used a couple of old bangles from a junk shop find to secure the strings to - larks head knots are the best way to attach the strings because they are so simply - basically you fold the string in two then, holding the middle like a loop,  thread the tail ends back through itself.


It also helps if you use a bit of tape to secure the work onto the table (unless you already have a proper macrame board of course!) 


Another good tip is to make cardboard 'bobbins' to wrap the long string ends around - it makes for less tangling up!  I wrapped them in their pairs for this project.


Once the strings were sorted, I began to make a square knot around the central 2 strings with the pairs of strings directly either side of it.


I made 5 'whole' square knots in total, in a line down the center strings.

Next I brought the two outer pairs of strings down the outside and, leaving a small gap, I used 2 x 'half' square knots to attach them to the two middle pairs...


1970s style belt


Then I used the same threads to work large square knots across all three middle pairs of strings...


how to make a macrame string belt


After that, the pairs were separated back out and, leaving a small gap,  the two outer pairs of strings were secured to the two middle pairs with 2 x 'half' square knots...


how to make a string belt


After that I began to repeat the pattern (i.e. leave a gap, make 5 square knots etc). Just make it as long as you need to go around your waist or hips.  My belt measured around 83cm not including bangles and tassels so if you want longer be sure to cut longer strings to start with (it's not an exact science!)


Repeat the pattern of knots until it is long enough...


Finish off in true retro style by tying small
 overhand knots in the ends of the tassels...


macrame string belt 1970s
(I decided the bangles were too big so squished
 them into a different shape!)


Oh - one last tip... if you are working on a table like I was, it helps to hold the strings you are knotting around between your knees  ... except maybe when you get a curious, string sniffing little visitor like this..


Enjoy getting knotty :-)


All photographs & text (c) Addicted to Making 2015

Thursday 7 May 2015

Forget-me-knot Emmeline...

handmade necklace

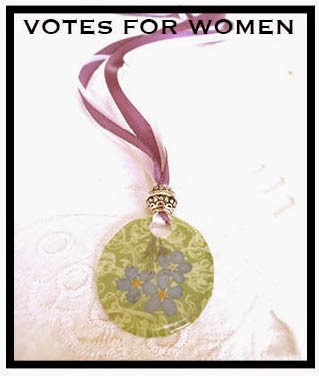
It's voting day and I couldn't do a blog post without giving a nod to the Suffragettes and Emmeline Pankhurst who fought so hard to get women the vote!  One hundred years ago in 1915 women were increasingly picking up the slack as their men went off to war.  The Suffragettes had pledged their help to the war effort by calling a halt on militancy at the start of WWI, but still they didn't qualify to vote until 1918 (and then only if over 30).  We take it for granted that we can vote today.

Also, here's an update on my progress with pressing those little Forget-me-Knots and the project I left 'cooking'.  It has taken a bit of time to get the microwaving technique working better and not loosing the colour of the flowers when glossing over with dimensional magic but I am getting happier with the results...


how to make a pendant


I've discovered that you need to cover the flowers before adding the glossy stuff - whether with clear tape or acetate - unless you do the colour just disappears.  It's much better if you cover them and it can help to keep them where you want them!

...and with the Suffragettes in mind I decided to string this one onto ribbons in their campaign colours.. white & purple with the background of the pendant already being green!


Also, while I was experimenting, I decided to make a small picture to have on my desk and I had these little wooden frames in one of my craft drawers that had come from a paper crafting stash....


...I popped some little flowers on some backing parchment, sat them behind the frame (which I had painted with some gold paint) and glossed over them.


I then added a piece of wire at the back to get the frame to stand....


and was pretty pleased with the result!  


forgemeknot picture


I can see lots of other uses for this technique now... it might become addictive ;-)

What flowers shall I press next...


All photographs & text (c) Addicted to Making 2015

Friday 1 May 2015

Forget-me-knots & starting again..


forget me knot flowers

My Dad gave me the Forget-me-knots growing in our garden and I've been waiting for them to reappear. He loved flowers and spent as much time as he could in his garden and was more than happy to share cuttings and seedlings.

forget me knot photograph
Such a totally gorgeous blue colour, some with white or some with yellow centres..

forget-me-knot photograph
Love the way they can also have little light pink or mauve colour flowers..

Spring is a symbolic time of re-awakening and never more so than this year it seems. It's been a fair while since I last wrote but to be honest, the end of last year was tough and I gave priority to family. We lost Dad in November.

I don't want this to be a sad 'poor me' post and things are more settled now but I've missed my little blog. I've missed crafting, I've missed thinking of random projects with historical or folklore themes to put on here. I need to put that right again.  So, I'm starting with the Forget-me-knots - it's the sweetest little unassuming & free-spirited flower and this time of year you can see it everywhere.  It's not fussy where it grows and it will self-seed and create a lovely border if you let it.

forgetmeknot picture

I've had it in my head that I would like to use some pressed Forget-me-knot flowers to make a pendant (..and I guess always have a bit of Dad in it somehow - he had lovely blue eyes when he was young too) but I am a little too impatient to press flowers in a book and wait months like I used to when I was growing up, so I made myself a small microwave book and experimented with how long to 'cook' them for to get them just right.

how to dry flowers

It's a tricky business but eventually they came out looking like this... 

dried forget-me-knot flowers

forget me knot pressed flowers

...however, as I discovered, you can then ruin them instantly when you try to pick them off the tissue!

forget me knot crafts
Carefully does it...

Still... trial & error and lots of patience have prevailed and I eventually had enough to begin experimenting with. First off I lightly glued them onto some paper and used some Mod Podge 'dimensional magic' to create the pendant look.  I was quite excited to see what it would come out like but, alas, the next morning they had all but lost their colour!  

make pressed flower pendant
Where's the colour gone?!


They still look quite pretty and I guess I might still set them in a proper frame but they weren't really the look I was going for.  

forgetmeknots


So, I have been working on my technique and there is another pendant setting tonight.  

mod podge pendant
will it... won't it...?

If it works I will do another tutorial and make a pendant with it.

To be continued...(wish me luck).


forgetmeknot
RIP Dad xxx


All photographs & text (c) Addicted to Making 2015

Saturday 8 November 2014

The Tower, Poppies and WWI Remembrance...


A couple of weeks ago I went to visit the poppies at the Tower of London - it was both stunning and humbling to think that each one represented a life given in WWI (and that was before the installation was even completed!) I am so glad I bought one ages ago as they are sold out now and I'm very much looking forward to having it in my new creative space when it's finished.

During half term my son was given the task of making something for his World War I topic homework.  One of the suggestions was to make a poppy and, as I'd made loads a couple of years ago after writing the crochet poppy post, it was an obvious one to pick (even his teacher suggested I would do it with him!)  So, while G made a mock up of a trench with soldiers for a photo based project I had a think about how we could do a different sort of poppy this time.  I remembered that he had used some foam clay earlier in the year for another project and decided we would make our own 'clay' poppies as a sort of tribute to the Tower poppies. We made several in both foam clay and silk clay which we bought from a lovely little craft shop called 'All The Pretty Things'....
foam clay

handmade poppy brooch

We made them into brooches & keyrings and G took them to school on the Monday.  Later that day he came home with... an 'order' list for around 30 (!) ...so you can guess what we spent the next few evenings doing...
..they were free on promise of making a donation so at least it should've raised a good bit for Poppy Appeal :-)

I also bought some gorgeous 'Milly' 100% wool while I was in the shop so I could have a go at 'super sizing' the crochet poppy pattern which turned out like this...


handmade poppy

I used a chunky 10mm crochet hook... this pic is to give you an idea of scale
handmade crochet poppy

I still get requests to make those little crochet poppies and made several new patterns for a Simply Homemade magazine feature  (one is now a free pattern on their blog here) However, I also felt I should do a new crochet poppy project for the Centenary and wrote a pattern for this 'Remembrance Style Poppy'...

I used a 4mm crochet hook, some red cotton DK - you'll also need a button, scissors and a needle.
remembrance poppy crochet

Begin with a magic circle and make 2ch into it...
poppy pattern free


Then make 13dc into the circle...
poppy pattern


Join with a ss then make 2ch...
world war one poppy


Make 2tr into that first dc...
how to crochet a poppy


then make 3dtr into the next dc...
poppy for WWI


3ttr into the next dc..
100yr anniversary poppy

3dtr into the next dc...

free crochet tutorial


Finally, 2tr plus 2 ch into the next dc and ss to the next dc. That's the first 'petal' done.
WWI crochet poppy


Start the second petal with 2ch, 2tr in next dc...
WWI crochet poppy


followed by 3dtr in next dc...
step by step crochet flower


3ttr in nect dc...
poppy flower pattern


3qtr in next dc...
poppy red scarlet


3ttr in nect dc...
WWI crochet poppy


3dtr in nect dc...
free crochet poppy pattern


2tr plus 1ch in nect dc...
poppy brooch

Leave last dc empty (it kind of helps to define the petal shape). Finish off and pull the thread end to close the middle circle. Sew in the ends at the back for neatness.
world war one poppy

Find a suitable button and sew it on with black thread.  Add a pin at the back.
crochet poppy pattern free


The pattern is free for you to use for personal use but please do make a donation to the Royal British Legion Poppy Appeal in return.


crochet  poppy


Lest we forget.


All pictures and text (c) Addicted to Making 2014