Sunday 23 December 2012

Christmas, biscuits & country cottages...

biscuit house


It's nearly Christmas day and I think we have everything ready - which kind of worries me because we are not normally this sorted and it makes me think we may have missed something.  Oh well, whatever it is I have one day left to remember and then we'll have to do without it (whatever 'it' is).

In the meantime I have been thinking of things to keep the G amused pre'TBD'  (The Big Day) and came up with the idea of festive biscuit houses which are along the same lines as gingerbread houses but which don't necessitate my baking loads of gingerbread. As you can see my 'house' turned out more like an abandoned, ramshackle barn but that said, I do kind of like it because not being too perfectionist allows you to get sticky & stuck right in - so great for kids! 


I thought I'd share it because, having had a go this afternoon,  it's messy, it's fun, it's a bit like building a house of cards and, best bit,  it's cheap as you don't need many ingredients so here goes....

You'll need some rectangular, plain biscuits...


....and some icing made up a bit like Goldilocks porridge i.e. not too thick and not too thin or it won't work!


Then you simply start sticking some biscuits together to make the basic shape and wait for it all to dry (because if you don't it will all fall apart as I discovered... many times!)


Add a roof and fill in the gap with another triangle of biscuit before drizzling liberally with more icing...


If, like me, you do not let the icing set fully between each bit of building the structure will start to slip & slide.  If it does... well you can always remove them and just add more and use the broken bits for 'walls' (or just eat them!) I say just have fun, make the best of it and pretend it was always meant to have that 'derelict shabby chic' look.  Oh - and then sprinkle with edible glitter because that just makes everything look pretty anyway!


christmas biscuit house

So, that's that.  And now, if I could just remember the thing I think I may have forgotten we should be all done for TBD....


Mince pies! I've just remembered that we have no mince pies for Santa tomorrow night... ah well, looks like the biscuit house will be put to even better use after all ;-)


                                                                             Merry Christmas !
                                              xxxxxxxxxx


Sunday 16 December 2012

Sweeties, challenges & the 'Stained Glass' DragonFly....

stained glass dragonfly
I've had a busy old time catching up on things since the challenge of the yarnstorm plus I had a day of not feeling well earlier in the week and just didn't feel like doing anything so pretty much had a day on the sofa with a duvet & daytime TV.

I so rarely spend a day like that but it's even rarer for me not to want to craft! Fortunately it didn't last too long and by late afternoon I started to feel a tad bored.... my fingers started itching to do something.  Obviously whatever I was going to do had to be 'lap suitable' with minimum toolage so I mentally ran through options such as embroidery, crochet, knitting etc.  Then I remembered my self imposed 'tatting challenge' and the story of how my nan had learnt to do it when she wasn't well and that just about settled it - I spent the afternoon improving my picots (more on that progress later).

Of course, having had a day of not eating much too, the first thing I fancied when I started to get my appetite back was something sugary (no surprises there) and my daughter had just happened to bring home a large tin of christmas chocs for us all to share - pre-Christmas- perfect timing!

recycling sweet wrappers


Later that evening, as we built up a growing pile of sweet wrappers and sat there twiddling them and smoothing them out (do other people do that?) my husband suddenly held one up and said 'I challenge you to make something with these!' - as you can guess, I am not one to turn away from a crafting challenge, ill or not, and my response was (after much brain racking) a 'Stained Glass Dragonfly'.


It is a fiddly make but the end result is quite pretty so worth the effort & patience I think.  I've done a few step-by-steps to show how I made it so that the thrifty among you can collect up all those sweetie wrappers at Christmas and have a go too:


To start with you need to make 4 x little wire 'wing' frames - I used 0.4mm beading wire but you could use thicker if you wanted.  Then, carefully paste some glue onto each wire wing and stick  them each to a separate piece of sweet wrapper.  It helps to press them down with something but be careful not to stick your fingers too!


 While the wings are drying, cut another length of wire and slide on some beads.  Make a 'body' for the Dragonfly by twisting a couple of times between each bead.  

When the wings are fully dry carefully trim off the excess wrapper with scissors.


 Sort the wings into pairs and put to one side.  Next, cut a 10-12cm length of wire to wrap around the body, just under the bead that you want to act as the 'head' of the Dragonfly.


Hold one pair of wings onto the wire 'neck' area and use one end of the wire to wrap around and secure them in place.  Repeat on the second side and use bent nose pliers to help tuck in the ends.  Use all the wire up and, if you feel it's necessary, add some more to help secure and cover the wing ends.


Finish off the tail end of the 'body' by twisting the wire ends together and trimming neatly.  Then arrange the wings to overlap slightly, give the body a little curve and your 'Stained Glass' effect Dragonfly is finished!


bead dragonfly


They look great hung in a window and I love the effect that slightly overlapping the wings creates.  If you make a really sparkly one you could try hanging it on the Christmas Tree!  Of course you don't have to stick with Dragonflies either as I'm sure the same technique could be used for lots of other shapes so go ahead, experiment & have fun.


recycled sweet wrapper
Fly Dragonfly... fly!


Oh  - and don't forget you might need to eat lots of sweets so you have enough wrappers for the project ;-)


Happy Making!

Friday 7 December 2012

Bath bombs of the woolly kind....

Those of you who have been keeping up with my PsAZZ Yarnstorm antics will know that this week saw the target 'Stitch Up' day arrive!

On Wednesday, several of us arrived at the BIRD building armed with needles, scissors, hooks and spare yarn for sewing up.  We also managed to take along a good helping of biscuits & cakes to help keep our energy levels up :)
 

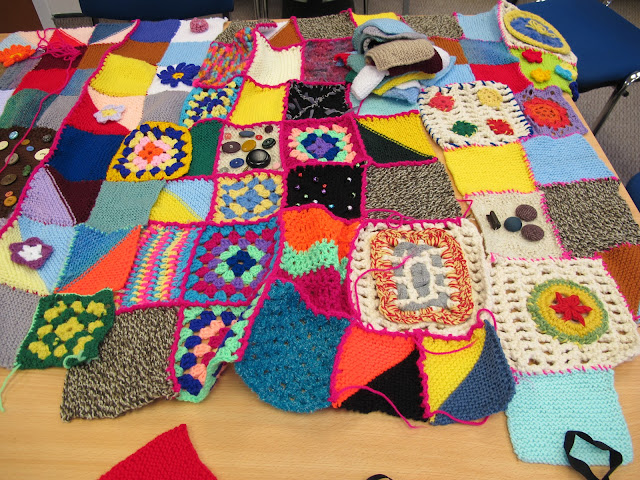
Despite my worst anxieties that we would not have enough squares to cover the door I was really pleased to see we had a good table full by the time we got everything laid out!  It was heart warming to see just how much effort had gone into the squares and motifs which had not only been sent in by group members and their families but also from patients & visitors to the nearby Mineral Hospital and from as far away as Australia!


 We had a heap of pom poms to play with....and some brilliant 'banners' with the group name on....


...and one group member had cleverly crochet some hands to represent our logo!


We soon got to work stitching all the different size & shape squares together....


Stopping only for a little light refereshment... (believe me these carrot cake & cream cheese cup-cakes were beyond delicious!)


Making up the garlands was pretty easy but it wasn't all plain sailing and we had a slight hiccup with the door blanket which, when hung up, dropped so much that it meant the gap we'd left for the letter box was  far to low!   Still, we were determined not to be beaten and did a quick bit of in situ stitching 'n' gathering and in the end all was well...

yarnstorm

we also 'dressed up'  some nearby drainpipes...


and strung up a magnificent cascade of pom poms....


 and by the end of the day all the garlands were criss-crossing and fluttering prettily between the windows...

yarnstorm in Bath

We still had some bits & pieces left on the table and a fantastic spider web creation too, but simply ran out of time & daylight! However, we certainly won't be letting it go to waste and we are returning next week to install the rest.

I really hope it manages to stay up all through December and helps to raise the profile of the PsAZZ Support Group! 

If you are in Bath, do pop by to have a little look :-)


Saturday 1 December 2012

On the first day of Christmas.....


How quickly the weeks shoot by this time of year - no sooner than I was out and about taking photos of the gorgeous sunsets & colours Autumn brings than I wake up to a frost covered garden and suddenly we are in December! 


It must be to do with the shorter days because there I was lavishing under the illusion that I had ages to make & prepare for Christmas now it feels like the clock is tick-tick-ticking!  

I haven't written out the cards yet and I'm hoping we'll get the tree up tomorrow  - maybe even the outside lights.  I have made a couple of things and my son's Moshi Advent Calender arrived weeks ago and, I guess at least I've been organised enough to fill my daughters advent 'houses' with little gifts.


So we got up and opened our calender windows this morning and I didn't want to leave you out so, my gift to you on this, the 1st Day of Christmas and start of the festive season is a video tutorial for a cute Christmassy felt heart ornament.....


The tutorial demonstrates all the basic steps needed to make the heart plus a couple of simple embroidery stitches to embellish it.  The same technique could be used to make all kinds of felt or fabric shapes such as stars, gingerbread men, birds and much more so hopefully you will have lots of fun with this one :-)


'Tis the season to be jolly where sparkle, magic & crafting inspiration is around every corner.   Our nights may be darker but they can also be filled with the warm glow & delicious scent of candles  - not to mention a tickle of excitement as the big day approaches...


Enjoy xx