Friday 26 April 2013

English Daisies, Flower Looms & King Henry VIII...

This week the sky has been more blue, the clouds fluffy and white and, it seems,  the sun has been getting his hat on judging by the glowing red bits on peoples arms & faces! We appear to be having a few traditional style 'April showers' too -  what joy... does it mean Spring finally here (shhh.... I don't want to jinx it!)

And at last our daffodils are out in the garden  (I thought they were going to stay closed forever)  -  along with the forsythia &  'soldiers buttons' so everything is beginning to look how it should, albeit a little later than expected. Huzb has been out and about tidying the garden, trying to remember what perennials we put in last year and basically filling in any gaps with yet more plants (expect LOTS of flowery pics as we head towards summer!)  Of course, I don't mind at all as the colours, shapes and textures of the flowers never cease to inspire me and yet again I have had a crafting idea brought on by a bit of natural loveliness... namely these beautiful 'English Daisies'...


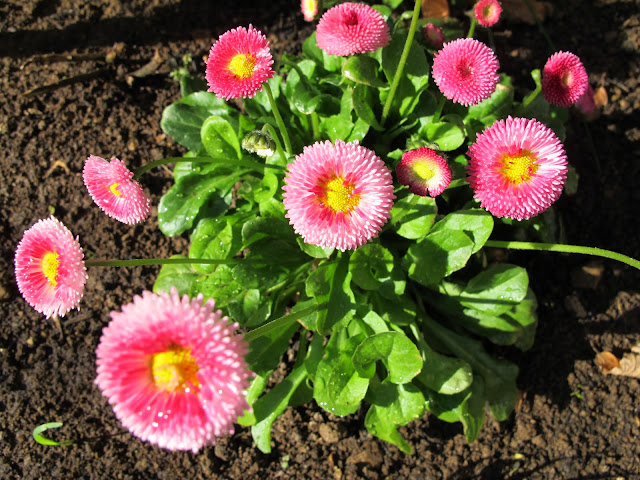
english daisy

These little delights are more like pom-poms than flowers and utterly gorgeous.  I also think their discovery is quite timely given their name and the fact it was St George's Day earlier this week - what better for an English country garden?!

english daisies
Oh look.... mini garden Pom-Poms!
Bellis Perennis

'Bellis perennis' 


There is much folklore surrounding the humble daisy - I bet most of us remember sitting plucking the petals off the white ones chanting 'he loves me, he loves me not'  and one tale is that King Henry VIII used to eat them to help ease his stomach ulcer pain (I'm certainly not recommending you try this!) But this particular type of daisy, well... aren't they just so frou-frou?  And the colour is so bright and very, VERY pink and ooooh... soooo girly  - how can you not just FALL IN LOVE with them....they are like little ballerina tutus! 

Ok, sorry - I think I was 'gushing' a bit just then. I guess that's what months of horticultural colour deprivation has led me to.   I mean I love the reds & greens  of winter and so on but I am SO ready to move on.   So let's make something shall we....

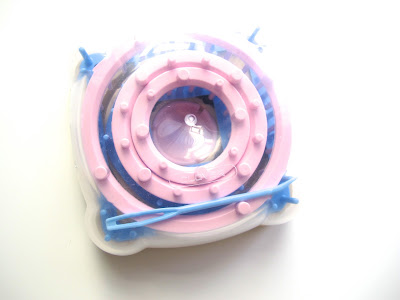
I have, in my possession, several flower looms - two of which are vintage and were given to me by my Mum and one pretty neat 'set' of differing shapes & sizes...


vintage flower loom
My vintage flower looms

flower loom set
My modern flower loom set

The set splits out in to several different shape & size looms
I actually used one of the older ones to do a project for a magazine back in 2011 which was primarily raffia flowers around a gorgeous floppy brimmed hat (very 70s retro!) and I do find that having a loom around is a very useful bit of kit as you never know when you need to wind a quick flower!  I thought the flower looms would be great for making a crafted version of the English Daisies and here's how I went about it..


I started out by selecting a few suitably colourful cotton DK yarns and, in addition, you only really need scissors & a bodkin along with the loom.  


I wanted a small flower so used the smallest size loom I had which is pushed onto the base as shown above.


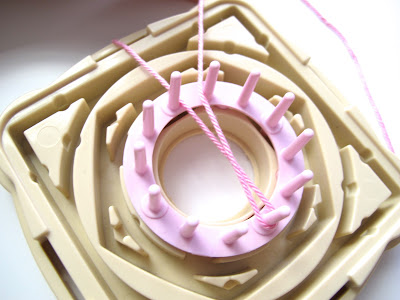
Attach the first, lighter shade of pink to the base by tying a knot in the yarn and sliding it into one of the side gaps to secure it.


how to use a flower loom
 Pull the thread across the top of the loom, horizontally from peg to peg.


how to use a flower loom
 Then begin to wind the yarn in a 'figure of eight' around the pegs.


instructions on how to use a flower loom
Keep the tension of the yarn as you work - it helps to hold it with a finger or thumb while winding with the other hand.


 Wind the yarn around each peg about 4 times.


 When ready, pull the end of the yarn into one of the side gaps....


 ...then trim and knot or, as I find easier, use a bit of tape to secure the thread while you continue to work.


 Now grab your second, darker shade of pink yarn and attach to the loom as before...


 Again, pulling the thread across the loom horizontally, begin to wind the yarn around the pegs..


 Keep working in a 'figure of eight' pattern as before.


how to use a flower loom
Aim to wind about 3 lots of the darker pink yarn around each peg.


 Once that's done, secure the cut end at the back and thread up your bodkin with some yellow yarn.  Begin 'sewing' from the bottom through to the top, between the gaps in the pegs..


pink and yellow yarn flower
If you work the stitches across from one side to the other you will get a 'star' type centre (there are other ways you can sew the centre if you prefer)


pink flower loom daisy
When you are done winding the darker pink thread, trim it and then cut all the other 'holding' threads so you can remove the small loom from the frame.


how to use a flower loom
 Once you have removed the loom it is easier to tie the yellow threads at the back.


flower loom crafts
Now you can begin to push the loops off the pegs...

flower loom daisy in pink
And once it's removed you have a 'traditional' looped style loom flower.  

However, we want more of a pom-pom look so...

 ... get your scissors and cut through all the loops!


You will then have a 'string petal' daisy flower and there's one or two last adjustments to make...


 Trim the inner (darker pink) yarn slightly shorter than the outer colour.


 Then use the tip of the bodkin to 'fluff' up the petals (which has the effect of slightly unravelling the yarn strands - cotton yarn is great for this!)


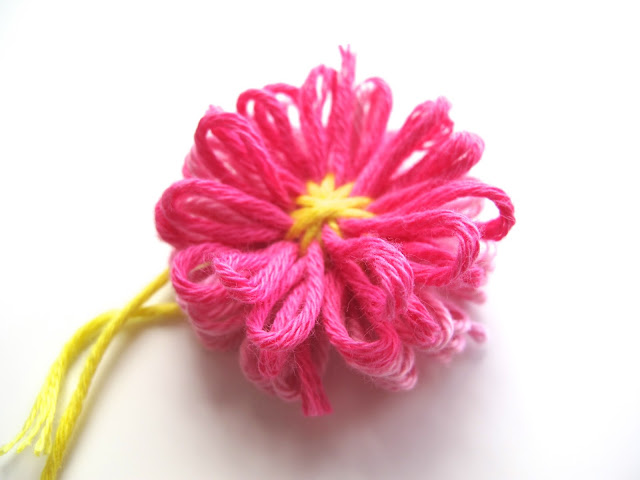
English Daisy made with a flower loom

...............and there's your first little  'English Daisy'.  Now you can begin all over again and make some more.


flower loom daisy
I'll leave it up to you are to what you might do with them... but to get you thinking....you could pop them on pipe cleaners to make a little posy, add  some felt or crochet backing & leaves to make brooch, attach one to a hair clip or hairband, stitch a button on the back and use them on a summery cardigan, embellish cushion covers or granny squares...

granny square with flower


....as you can imagine - they have lots & lots & LOTS of uses!  


Happy Making xxx


(c) All photos and texts copyright of Addicted to Making Blog 2013
Sunday 14 April 2013

The Great British Sewing Bee, vintage skirts & collars...

home sewing
Ok - hands up who has been busy dusting off their sewing machine and making eyes at the rolls of pretties at the nearest fabric shop?  You have...? Well you are certainly not alone as far as I can tell, since the airing of the first episode of  The Great British Sewing Bee 

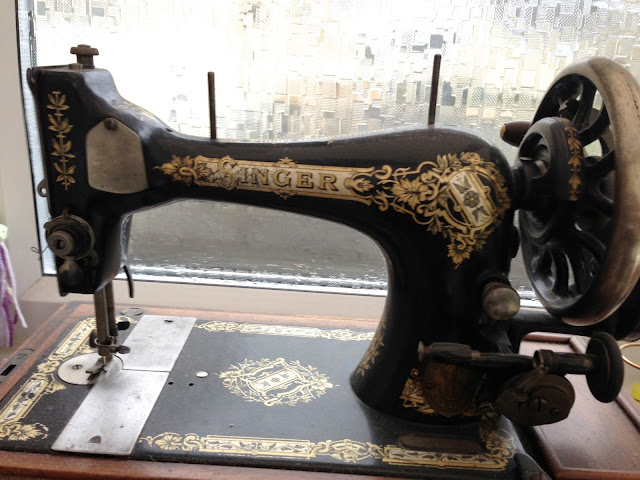
Vintage Singer Sewing Machine 
(Don't look too close... mine really is covered in dust a I tend to use a modern one for the real thing)
The program, currently airing on BBC2 has apparently started a bit of a sewing revolution (for those who don't already indulge in all things crafty of course ;-) and my local haberdashery shop owner reported a positive upsurge in sales of not only fabric but also sewing machines which can only be good for the economy if happening up & down the country! 

I have to admit I enjoy anything to do with crafts and eagerly watch any crafting programs, I also buy far too many magazines and have a sizeable stash of mixed craft books (new & old) to the extent that I could probably operate a small a mini library. And that's all the confession you are getting out of me today....  except, ok,  maybe perhaps I also do have a small tendency to buy lots of random thrift store stuff too and, oh look what I found in my vintage pattern collection...
A-Line Skirt Pattern
What a classic!
...yes - it's the good old vintage Simplicity 5937 'A-Line' skirt pattern.  Circa 1960's I think, but it may also well be the same one they were still using in my needlework classes at school! It was, infact, the first piece of 'proper' clothing we were allowed to try and make.  

I laughed when I saw the contestants being given one of these to make on 'TGBSB' because, I remember my mum took me shopping to get some fabric (much to my excitement) and, savvy little fashionista that I was back then, I picked out an apple green, fine corduroy fabric.   Yes, you heard me right on both counts - I did mean a shade of green of the APPLE variety and 'corduroy' - that heavy, slightly weird velvety-felt textured fabric that I learnt never really works well for anything other than trousers (shop bought ones).  Do you know I don't think I ever do remember wearing that skirt...even after I'd done a pretty perfect waistband and hidden zip!

Anyway, in honour of all things sewing-y I thought I would pop up a project that I originally had published in a mag a year or so back that is nice 'n' easy if you are feeling too intimidated by the thought of a whole dress etc.
free collar pattern
It's a collar!  As you can see I made this one in a rather funky leopard print fabric (again, appropriate at the time) but it could also be made in something like a plain vintage cotton or perhaps satin or even lace.

So got your fabric, scissors, pins & needles at the ready?  Let's start...


fabric collar pattern free

(double click the pic or try  here for pattern)

And here are the simple step-by-steps:


cutting out a fabric collar
(1)  Trace the collar pattern and use it to cut out 4 x fabric collar pieces. Place 2 x pieces 'right sides' together and sew around the edges, keeping within the inner and outer guidelines.  Repeat with remaining 2 pieces of fabric. Make some small ‘V’ cuts in the fabric around edges (be careful not to cut your stitches!)


(2)  Turn the collar pieces right way round. It helps to use something like a pen to push the fabric up from the bottom to get it started. Smooth out the collar pieces and press, making sure all the corners are neat.


(3) Turn the back of neck end edges inwards and pin.  Then sew the edges together neatly.


(4) Sew the two collar pieces together in the middle at the front with a couple of stitches.  Add a vintage button or ribbon bow.


(5)  Check the size of the collar for fit and add a popper on the back of neck ends so that you can secure it when wearing it.


Tip:  If you want to use a flimsy material such as satin, be sure to pop some iron on interfacing fabric in between the layers to make the collar less floppy.


It doesn't get much easier than that does it?  

Hope you have fun making it!

xxxxx

Friday 5 April 2013

Fashion, Monochrome & Daisies...

retro 60s necklaceThe decorating, bead sorting & clearing up is still going on but I'm making sure I have enough left to play with and now I'm itching to get going with a new project (getting a bit bored with all work and no play!) 

I also think I am over chocolate for a while, having been far too indulgent in recent weeks (well... you just have to join in don't you!) and I feel the need to move on to simpler things.  So, what can be simpler than 'Monochrome' - something that is trending all over fashion houses this spring! 
black and white daisy beads


I can't resist a bit of fast fashion making so, I've pulled out some very 'Mary Quant' style daisy beads and a few black & white acrylic beads from my stash and made a retro 60's style necklace that should bring you bang up to trend without the spend (I may have just created a new catch phrase there!)


To make this fun & stylish necklace just follow these steps:


(1) Begin by placing a small contrasting acrylic bead in the centre of a flower bead then thread a long eye pin through the two beads at the same time.


(2) Now use round nose pliers to turn a small loop on the end of the wire (try to aim for similar size to the other end for neatness...). 

Repeat the first 2 steps to make 5 wired flower beads in total.


(3) Next, open a 10mm jump ring and use it to connect two flower beads together.


monochrome beads
(4)  Repeat step 3 until you have connect all the wired flower beads as shown above.


 (5) Thread a large (19-20mm) round acrylic bead onto an eye pin, bend the wire over at right angles, trim to around 1cm and turn a loop on the end.  

Repeat with a medium (10-12mm) size acrylic bead, then 2 small (8-9mm) acrylic beads and link them all together on one side of the necklace with 9mm jump rings.

Now repeat it all for the second side of the necklace (*adjust the amount of beads according to length required)


(6) All you need to do now is add the clasp ends to either side of the necklace (above and below) 


...and there you have it, your on trend,  monochrome  60's style necklace!


fashion spring 2013


Think I'll be wearing this one out this weekend :-)

Happy Making
xxx