Hello Again!
Here we are in December and how quickly it has arrived! The Robin is back and happily singing his heart out at the top of his favourite tree each morning while our house is full of advent calendar openings & munching sounds. The current calendar count = 7 and apparently there's another 2 on the way from Grandparents...all that choccy before breakfast feels a tiny bit decadent ;-)
Of course we've also had the obligatory trip up into the attic to get down all the tubs of trimmings (..I can never remember which tub has what in..) and we've rescued our trusty old fake tree! It'll just about last for another year by the looks of it and with a curious puppy around it's probably better than a pine-needle-in-the-paw drama! Maybe next year we'll splash out on a new one.
The other thing that the beginning of December brings is Christmas card writing and this year I thought I'd make a few cards too , especially being as I had all my card making stuff out following a recent magazine commission (sorry.. can't tell you any more about that right now... )
Anyway button cards are sweet & easy, you only really need a good stash of buttons and a glue gun. I really like this simple tree design..
A button heart could be for Christmas or any other occasion come to that - and who doesn't like hearts?
I also wanted to try something I haven't done for a while... quilling. I discovered all my quilling bits and tools hiding at the bottom of my card making stash and decided to buy a new pack of paper strips and some glue when I went shopping at the weekend. That's pretty much all you need really. Oh, and maybe a little patience as it can be fiddly.
As I was starting the project on 1st Dec I got inspired by the whole 'Partridge in a Pear Tree' vibe and started out with a rough sketch of a partridge-like-bird and pinned it to a piece of corrugated cardboard..
Then I began making a small yellow coil with the Quilling Tool which, for those who have never used one, has a split in the end that holds the paper strip while you start to wind.
I then put a tiny dot of glue on the end..
Let it uncoil slightly before pressing the end down to make a basic circle shape.
When it was dry I squeezed one side to make a tear drop shape.
Then I tried it out to see if it fitted the 'beak' of my bird and pinned it into place so I could go on working the rest of the piece around it.
I used lots of pins to help hold the paper strips in place and some longish strips to create the outline of the bird..
It's quite useful and time saving to make up a batch of paper coils in various colours and sizes as then you can pick, shape and place them without having to keep stopping.
Gradually I filled in the outline with shaped coils and used tiny dots of glue to stick them together. Every now and then I checked I was able to slide a blade underneath the bird and that it wasn't all stuck to the paper.
Eventually, when dry, I was able to lift the whole piece off the paper. At this point you can still shape it a little by gently squeezing the sides.
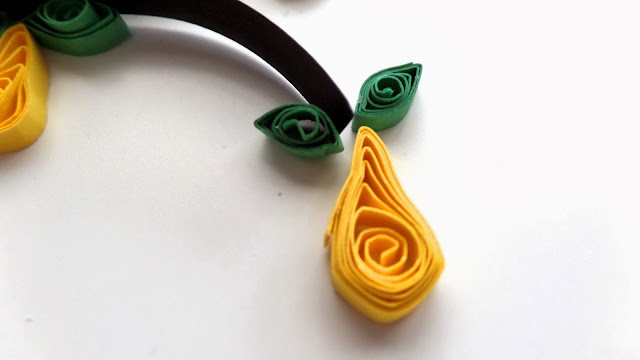
I made a few yellow coils and shaped them to looked like 'pears'..
After quite a lot of experimenting with a whole tree design I decided that just a branch might look better and, more practically, would fit on a card a bit better. And then, because it didn't look partridge-y enough for my liking - more like the plump wood pigeons I see in the garden - I added a couple of coils to it's head. I'm hoping the pears are a good clue to theme too ;-)
The cards just need a suitable sentiment to finish them off and maybe a little hand stamp on the back.
'Tis truly the season to be jolly and I'm sure I will be back soon with another festive inspired make but for now....
Happy Making!


luv it
ReplyDelete