Just look at the colour of the sky today - g.e.o.r.g.e.o.u.s isn't it - makes you want to go and dance under a Maypole!
Early this morning, as I washed my face in the morning dew...well, OK, not really but there is an old myth that says to do this will bestow beauty upon you!
Actually I was simply sat outside with my cup of tea, watching the birds and generally enjoying the fresh earthiness of the air and began to ponder what type of mini-make I could do to welcome in the new month. To begin with I was tempted to go for something festooned with colourful ribbons 'Maypole Stylie'...or maybe something with bells on a la Morris Dancer. Then I began to fancy the idea of something along the lines of a floral crown for a May Day Queen....
The traditional role of a May Day Queen is to generally sit on a throne looking beautiful while everyone else dances & celebrates around her. It's believed she is meant to represent the personification of 'Flora' - a minor Roman Goddess associated with spring, fertility & flowers (the latin word 'floris' meaning flower). In fact, a festival in her honour known as 'Floralia' was held between 28th April to 3rd May.
Anyway, having a fondness for all things Roman (that'll be my Bath upbringing again...) I decided to go with the Flora theme - often she was depicted with a flowery garland on her head and, in addition chose white to represent innocence & purity.
Here we go...
First of all I sorted out some green cotton cord and a piece of white tissue paper (yes I know it's wrinkly but it's recycled from a gift and really doesn't matter for this project...)
Then I folded it, lengthways, in half, then half again so that I had 4 'layers'. I then cut some small strips around 10cm x 2cm (but this is totally up to you and how large you want your flowers to end up - there are no hard & fast rules)
You need to make sure each strip has no 'looped' ends and if so, cut them with scissors.
Now, beginning at one end of the strip, fold it into a 'concertina' as shown.
Then trim each end of the folder paper slightly to give it a rounded edge.
....and don't forget to put a snip in each side of the middle point of the paper strip.
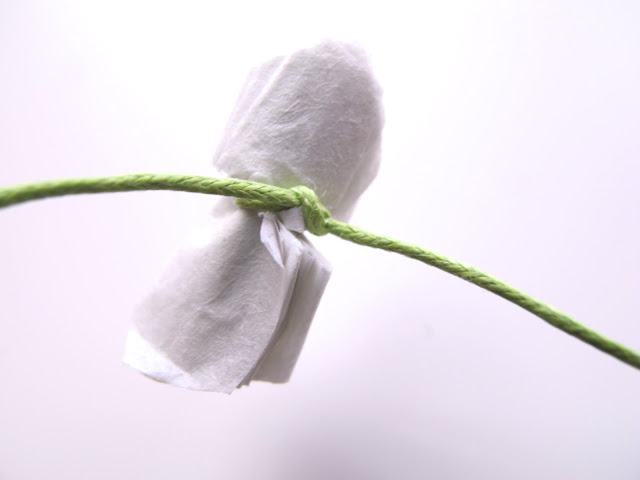
Next, tie the cord tightly around the middle (where you made the small cuts) and knot it to secure.
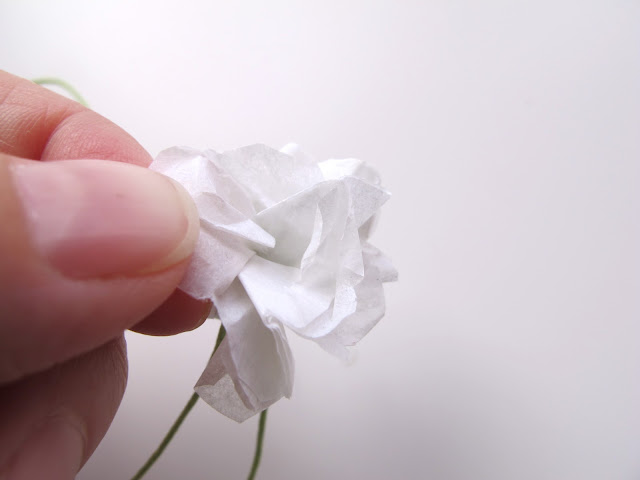
Then (and this is a fiddly bit....) begin to gently separate out the layers of tissue paper from each other. Slightly damp finger tips help do this.
Keep pulling, separating & fluffing until your paper resembles a small blossom flower.
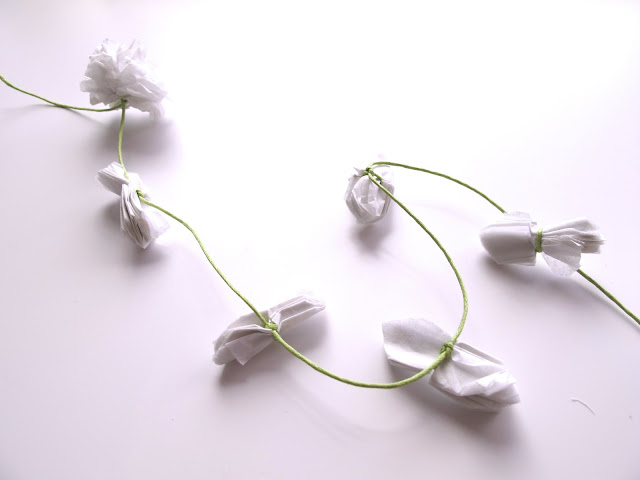
To speed things up, I cut several more strips and attached them to the same strand of cord.
...and once that was done, I went back along 'fluffing' each one into a flower so I had a small 'garland' of paper blossoms.
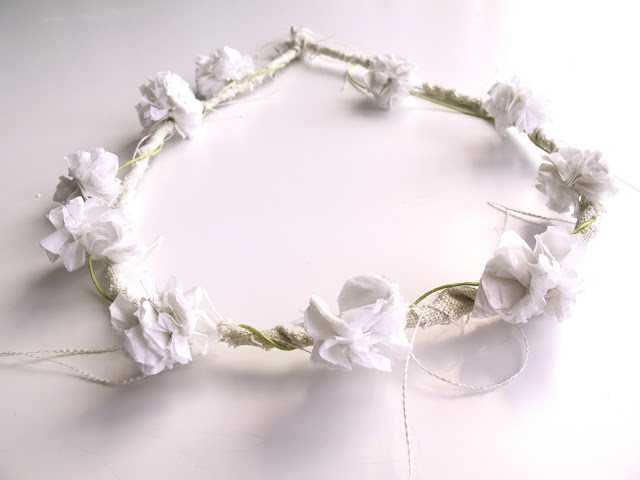
To make it into a 'floral crown', I covered some thick wire with ripped strands of linen fabric and then wound the strand of flowers around it ...
Simply adjust the fit according to the size you need and voilà... a pretty little floral crown fit for a May Day Queen!
If you want to go for all out for that sweet & innocent 'May Day Queen' look , you could always add a few strands of white ribbon to dance prettily down the back.
Happy 'May-king' :-)


I love the floral crown - so effective! Lovely clear instructions - thank you.
ReplyDelete